Outlook disconnected, 2010/2016 Co-Existence issues with RPC

We installed  Exchange 2016 for Co-Existence with Exchange 2010.  Configured the Exchange 2016 Virtual directories, We were testing the Outlook anywhere and found that the internal Exchange 2010 users are unable to connect to Exchange while new created Exchange 2016 users could connect fine with there Outlook clients.

We were getting outlook is disconnected. But OWA and Active sync was working fine.

  • We have checked outlook anywhere configuration which seems to be fine.
  •  Checked the name from the internal access point for Outlook.
  1. Get-OutlookAnywhere -Identity “exch2016-01\Rpc (Default Web site)” | select InternalHostname
  • Checked the name from the CAS Array on your Exchange 2010 with following Cmd:
  1. Get-ClientAccessArray | Select Fqdn
  • Checked RpcClientAccessServer is set on the Exchange 2010 Mailbox Databases
  1. Get-MailboxDatabase | Select Name, RPCClientAccessServer


RPC Client Access Arra/Server and the internal Outlook Anywhere names were the same, that caused a routing loop once we switched over the default namespace to Exchange 2016.

So we fixed this name issue with below cmd.

Set-MailboxDatabase –Identity “<Database Name>” –RPCClientAccessServer “exch2010-01.contoso.local”

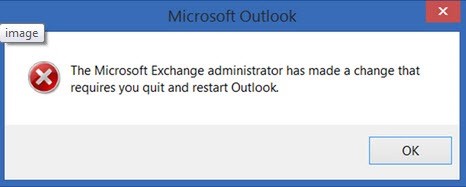
in relation to the end-user.  Changing this setting results in end-users getting pop-ups in Outlook stating that an Exchange Administration has changed settings and that Outlook must be closed in re-opened.

cq


2010/2013/2016 Coexistence – 421 4.4.2 Connection dropped due to SocketError EMAILS Stuck in QUEUE

One of our engineers was facing the issue while setting up coexistence between 2010 to 2016.

all the E2010 mail flow working fine internally and externally

We moved test mailboxes to E2016 & send emails from E2010 to E2016.

E2016 mailboxes were not able to receive the email, we checked the email trace, email queue and found “421 4.4.2 Connection dropped due to SocketError” when an E2010 mailbox tries to send to an E2016 mailbox

To fix this issue we made the below changes


  • Open Regedit (Start | Run | Regedit)
  • Navigate to the registry key: HKEY_LOCAL_MACHINE\SYSTEM\CurrentControlSet\Control\SecurityProviders\SCHANNEL\Protocols
  • Here you will need to create a key for each of the cryptographic protocols. Create keys named TLS 1.0 and TLS 1.1
  • Within each protocol key, create two subkeys. One named Client, the other named Server
  • Within each of the Client and Server keys, create a DWORD with the name Enabled. A value of 1 enables the protocol where a value of 0 disables it.
  • Within each of the Client and Server keys, create another DWORD with the name DisabledByDefault. A value of 0 enables the protocol (i.e. not disabled by default).

5

No reboot required.


Import and Export Receive Connector Exchange 2013/2016

How to Configure Exchange Server 2016 SMTP Relay while upgrading your email services.

In most organizations, there are several devices or applications that need to use an SMTP service to send email messages. An Exchange can provide that service for you, however, the configuration required on the server depends on the SMTP relay requirements of your scenario.


In my scenario, i am upgrading our client’s exchange server 2013 to exchange 2016. Now today we are moving application relay workload to new exchange 2016 server.


Few things you need to follow.

  1. Export all details of the current connector.
  2. Share the IP details with the responsible team for confirmation.
  3. Once you get the confirmation create new connector on new exchange server with below followings steps.

1:-Export Current Connector Information:-

You can use below cmds on EMS.

$list=(Get-ReceiveConnector “servername\external Relay”).RemoteIPRanges > c:\relayIPs.txt

Get-ReceiveConnector “servername\nameofconnector”| select -ExpandProperty remoteipranges|export-csv c:\filename.csv

Now in given path you will see a csv or txt file as per you cmds selection.

2:- Verify the configuration.

You should check the existing configuration of the connector. I suggest you ,  To document the configuration for reference.

Get-ReceiveConnector “CPLEXCH03\GC APP-FFRAPP-2013” | fl > c:\relayIPs.txt

3:- Create New Connector on Exchange 2016 

New-ReceiveConnector -Name “AppRelay” -Server servername -Usage custom -Bindings 0.0.0.0:25 -RemoteIPRanges 10.10.12.13 -MaxMessageSize 30MB -TransportRole frontendtransport

4:- How to Add Remote IP Addresses to new  Receive Connectors (You can use same cmds to add on IPs on existing connector)
$RecvConn = Get-ReceiveConnector “Connectorname”

Place IP address in text file  and save in c:printer.txt

Get-Content .\printer.txt | foreach {$RecvConn.RemoteIPRanges += “$_”}

Set-ReceiveConnector “AppRelay” -RemoteIPRanges $RecvConn.RemoteIPRanges

5:- Add Permission on connector

Get-ReceiveConnector “apprealy” | Add-ADPermission -User “NT AUTHORITY\ANONYMOUS LOGON” -ExtendedRights “Ms-Exch-SMTP-Accept-Any-Recipient”

Set-ReceiveConnector “servername\apprealy” -PermissionGroups AnonymousUsers


Method 2. 

You can use below scripts to copy the receive connector on multiple servers. 

Copy a receive connector from one Exchange Server to multiple Exchange Servers

Clone Exchange 2016/2013 SMTP Receive connectors